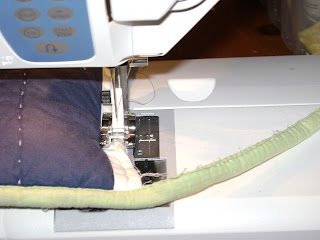
Back to the how-to’s. While the bumper was still tied to the crib, I took a pencil, and marked where it met the back side of the crib, so I would know where to cut.
There are not special measurements. I just suggest that after you have tied the bumper onto the top rail (part one of this tutorial), that you leave yourself a couple of extra inches to work with. You are almost ready to start cutting.
My bumper has a nice binding going all the way around it. I cut through the bottom binding and on up until I had almost reached the top binding.
Then I got out the fancy stitch cutting tool that came with my sewing machine. I cut the stitches that were holding the binding to extra fabric I had previously cut away.
You are going to want to leave yourself enough binding to reattach and close to the open edge.
Save the extra material if you plan on adding more ties, or if you want to add a matching length across the back of your crib. I notice that my baby's crib does look a little bare in the back with the padding only along outer 3 edges.
Once the scraps are cut away, you want to go back and thin out the edge you are going to be sewing. I have a pretty thick layer of batting in mine, so I cut it about ½ inch of the inside filler only. This makes the job of adding binding easier. Start to sew the raw edge closed. I used a straight stitch. This is for strength, we'll add the binding next. |
| Sew the raw edge, not the binding, remember to back-stitch to secure. |
The binding, I only know how to explain attaching it by showing you. I folded the corner, and started to sew. Notice how I held the corner, that’s exactly how I put it under the presser foot. You could hand sew this for a little cleaner look, it will just take you more time. You could also pin it into place. I don't like to pin, so I just straightened it as I sewed.
 |
| Don't forget to back-stitch the beginning and the end for safety. |
 |
| Not my cleanest work, but I was done fighting my machine at this point. |
Do you absolutely hate binding? I know I still struggle with it, that’s why I machine sew both sides. If you want an even easier fix, you can just fold the edge of the fabric in on itself, and do a nice zigzag stitch to close up the edge. I think a serger would also work nicely since this is not an easily visible edge. I do not use one myself, but they do make a pretty clean edge in much less time than adding binding.
I decided that since Christian likes to chew on the new teething rail so much, I would not add more ties. He likes to chew on the loose, inside edge; my strange little guy. He has never been able to pull any of the existing ties loose in the week that we’ve been using this, so I feel confident that he is safe. Cutting off the extra length just makes for a cleaner look then leaving it hanging behind the crib. If you would like to add more ties, they are easy to make, and can be made using the extra scrap that you just cut off. Check out the mini tutorial at the bottom.
The finished product.
 |
| I tied with a simple square knot instead of a bow for fun this time. |
So you want to add some extra ties to your teething rail? Here’s how you do it. Use some of your scraps. Cut about an inch wide strip from the narrow end. Cut enough to add two ties to each area you want to add a tie to. You can completely avoid pinning by using a hot iron and spray starch. I recommend doing it that way. My quilting sister taught me this trick. Next you want to fold them in half length wise.
 |
| This band-aid is not a sewing ouch, but it is making typing difficult. |
If you iron these down, and fold again your rough edges will be tucked safely into the fabric.
To finish the narrow ends simply fold them down into themselves and sew. It’s easy to run along your outside edge with the sewing machine on the three open sides. I almost never pin when I sew. I am a combination of sister/self taught, so I know that I do not follow any of the sewing rules professionals use.
To add your new ties to the teething rail, just line up the narrow edge to where you want it and do a zigzag stitch. I also recommend using a very short stitch. That will help to secure it tightly so your baby cannot pull it off. Finally, don't forget to back stitch. That is what locks your work in place, and keeps your baby safe.


this is SO innovative i LOVE it!!!!!
ReplyDelete